RECORD ENDS COLLECTION
Production &
kitting guide.
Bill of materials, packaging assembly, and final packing requirements.
WORKING DRAFTProduction overview
Three products. Six color configurations.
A shared reference for final quotation, packaging assembly, and retail kitting.
| Product | Colors | Contents per retail box |
|---|---|---|
| Record Ends | Black / White | 1 unit + 1 matching magnet + 4 cork feet |
| Headphone hook | Black / White | 1 headphone hook |
| Now playing stand | Black / White | 1 now playing stand |
Customer supplies
Branded black and white magnets, natural cork feet, and packaging artwork.
Manufacturer supplies
All other components, product manufacture, packaging production, assembly, kitting, and shipment to the warehouse. Production quantities have already been provided.
Production quantities by product and color
BOM quantities are per finished retail box.
| Product | Black units | White units | Total units |
|---|---|---|---|
| Record Ends | 100 | 100 | 200 |
| Headphone hook | 100 | 100 | 200 |
| Now playing stand | 100 | 100 | 200 |
| Total | 300 | 300 | 600 |
Record Ends packages require 100 black magnets, 100 white magnets, and 800 cork feet on 200 sheets. Accessories receive no magnets or cork feet.
Bill of materials
Quantities per finished retail package.
Record Ends
| Component | Qty | Requirement | Supply |
|---|---|---|---|
| Record Ends unit | 1 | One unit in the color assigned to this production configuration; per approved product specification. | Manufacturer |
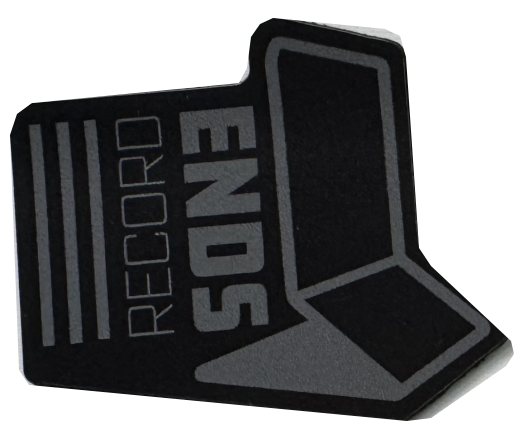
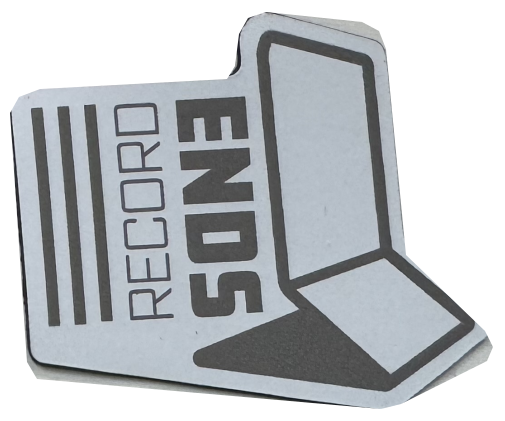
| Branded magnet | 1 | 44 mm at its longest dimension; must match the product color. Pack on top of the cork sheet inside the small bag. | Customer |
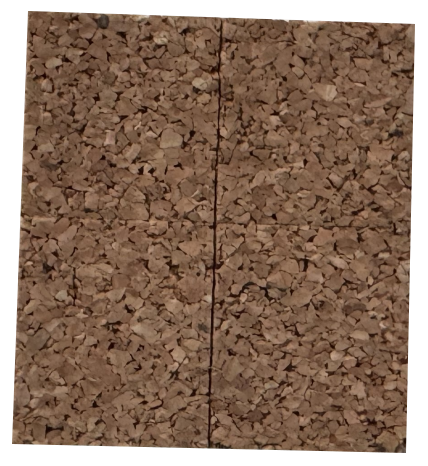
| Natural cork feet | 4 on 1 sheet | 35 × 35 mm overall sheet; four squares on one 2 × 2 backing sheet; peel-and-stick. Leave on backing sheet. | Customer |
| Resealable small parts bag | 1 | Approximately 45 × 45 mm internal; confirm fit with magnet and complete cork sheet. | Manufacturer |
| Thick protective poly bag | 1 | Contains the product and small parts bag; specification to confirm. | Manufacturer |
| Printed retail/shipping box | 1 | Approved design; black and white color checkboxes. | Manufacturer; customer artwork |
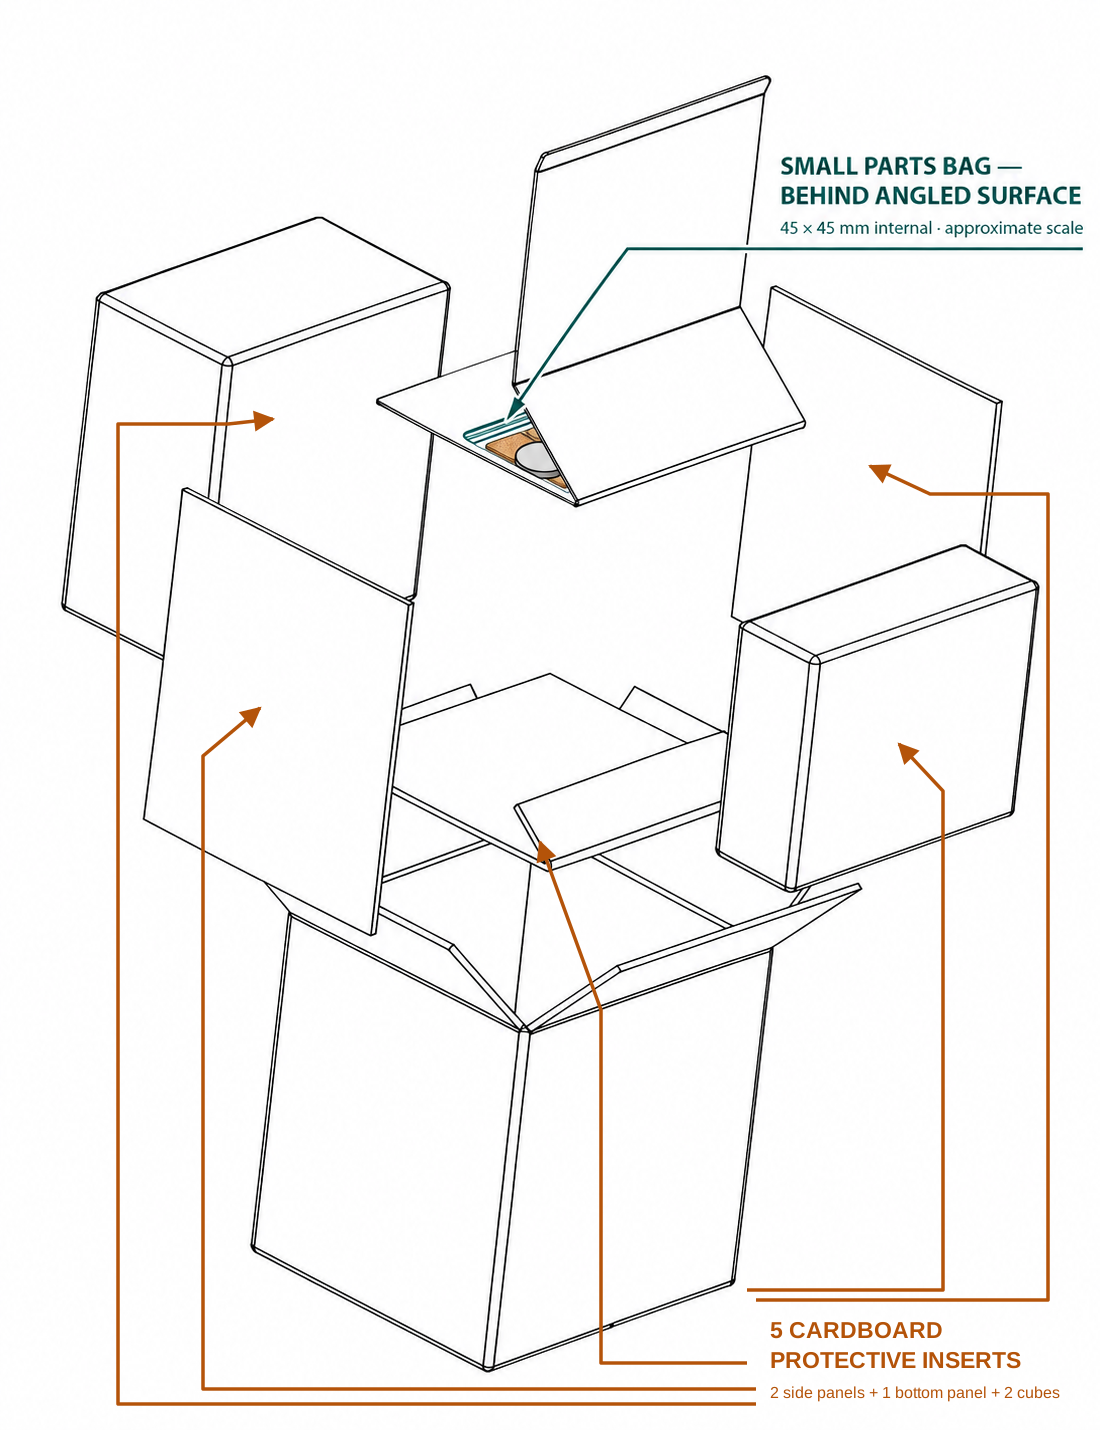
| Flat cardboard side/bottom protection | 1 set | Three flat inserts: two side panels and one bottom panel, per approved packaging design. | Manufacturer |
| Cardboard void-fill cubes | 2 | One on each side per packaging design. | Manufacturer |
| Closure adhesive | As needed | Glue preferred; method to be proposed. | Manufacturer |
Headphone hook
| Component | Qty | Requirement | Supply |
|---|---|---|---|
| Headphone hook | 1 | One unit in the color assigned to this production configuration; per approved product specification. | Manufacturer |
| Thick protective poly bag | 1 | Sized for product; specification to confirm. | Manufacturer |
| Printed retail/shipping box | 1 | Product-specific approved design; color checkboxes. | Manufacturer; customer artwork |
| Closure adhesive | As needed | Glue preferred; method to be proposed. | Manufacturer |
Now playing stand
| Component | Qty | Requirement | Supply |
|---|---|---|---|
| Now playing stand | 1 | One unit in the color assigned to this production configuration; per approved product specification. | Manufacturer |
| Thick protective poly bag | 1 | Sized for product; specification to confirm. | Manufacturer |
| Printed retail/shipping box | 1 | Product-specific approved design; color checkboxes. | Manufacturer; customer artwork |
| Closure adhesive | As needed | Glue preferred; method to be proposed. | Manufacturer |
Record Ends kitting
Prepare the packaging
Fold the box to its loading configuration. Prepare the flat side/bottom protection and assemble both cardboard cubes along the intended score lines, following the approved packaging design.
Prepare the small parts bag
Insert one complete 2 × 2 sheet of four square natural cork feet into the approximately 45 × 45 mm internal resealable bag. Leave all feet on their adhesive backing. Place one color-matched branded magnet on top of the cork sheet. Fully close the bag.
Place the bag on the flat bottom surface
Set the small parts bag on top of the Record Ends unit’s 200 × 230 mm flat bottom surface. Placement inside the triangular nook or elsewhere on that same surface is acceptable, provided it does not protrude or interfere with the inserts. In the illustrated nook placement, the bag sits behind the angled surface and may be partly hidden from view.
Bag the unit and small parts together
Place the complete unit into one thick protective poly bag, keeping the small parts bag on the specified surface during handling.
Fit the flat cardboard protection and load
Position the flat cardboard sides and bottom around the bagged unit per the approved packaging design. Load the protected assembly into the box.
Fit both cardboard cubes
Insert one cube into each intended side void. Seat both correctly to restrain movement without crushing the product or small parts.
Check contents
Verify one product, one matching magnet, four cork feet on their backing sheet, both bags, two flat side panels, one flat bottom panel, and two cubes (five cardboard protective inserts total).
Annotate color
Using a black Sharpie or permanent black ink, mark the checkbox corresponding to the enclosed product color: BLACK for a black unit or WHITE for a white unit. Leave the other checkbox unmarked. Use black ink for both color configurations; allow the ink to dry before handling.
Close and seal
Close the flaps in the sequence required by the approved box design. Seal using the agreed adhesive method. Keep the finished package clean and retail-presentable.
The small parts bag rests on top of the product’s flat bottom surface, inside the main protective poly bag. Do not pack it underneath the product or loose elsewhere in the box.
Reference B · Actual components
Photo cutouts of the supplied parts. Black and white magnets are alternatives; pack one matching magnet per unit.
Reference C · Small parts bag and stacked contents
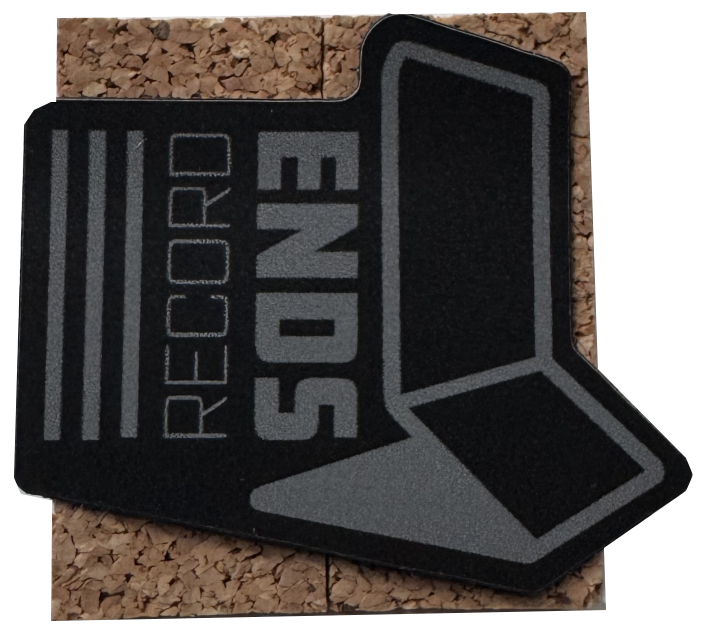
The bag has approximately 45 × 45 mm of internal space below the zipper. The extended zipper/header area is shown above that space. Original-photo cutouts show the cork sheet beneath the matching magnet; a light plastic effect emphasizes the bag.
Black unit
White unit
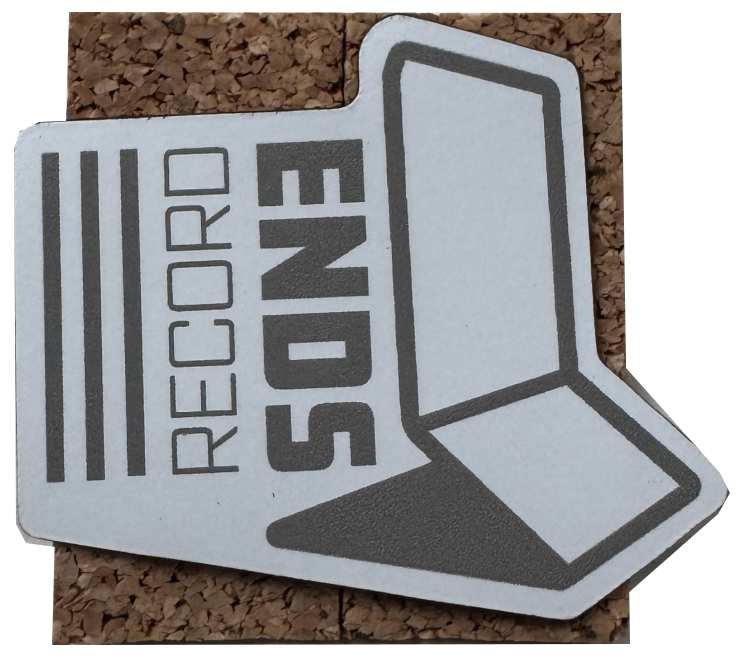
Bag outline: approximately 45 × 45 mm internal. Cork sheet: 35 × 35 mm. Magnet: 44 mm at its longest dimension. The magnet is shown at 44/45 of the bag width; confirm physical fit and sealing clearance with the actual bag before production. Each stacked photo is scaled uniformly; individual parts have not been resized relative to each other. Separate component cutouts are enlarged for identification, not presented at a shared scale.
Accessory kitting
Same process, separate product-specific boxes.
Use this sequence independently for the headphone hook and the now playing stand. Neither accessory receives a magnet, cork feet, or other loose items.
Assemble the correct box
Fold the product-specific box along its intended score lines using the approved packaging design.
Inspect and bag
Check product finish, cleanliness, and color. Place one product into one thick protective poly bag.
Load and identify
Insert the bagged product into its respective box. Using a black Sharpie or permanent black ink, mark the checkbox matching the product color (BLACK or WHITE). Use black ink for either color; leave the other checkbox unmarked and allow ink to dry.
Close and seal
Close the shipping-style flaps and seal using the agreed adhesive method. Verify a clean retail appearance.
Closure & final checks
Clean retail presentation, secure shipping closure.
Glue closure preferred for all three boxes
Boxes close with shipping-style flaps rather than tuck-in flaps. Manufacturer to propose the adhesive, application method, and flap-closing sequence appropriate to the actual box construction and intended shipping conditions.
Prevent visible glue residue, staining, distortion, and adhesive contact with the product or bags. Exterior tape is not preferred. Identify any need for tape or a design change before production and include the impact in the quote.
Finished-package inspection
- Correct product and box; finish free of visible damage and contamination.
- Product color agrees with the marked checkbox.
- Record Ends only: matching magnet, four feet on one backing sheet, and small parts bag in the specified location.
- Protective bag and all required inserts present and correctly positioned.
- Contents restrained without crushing; closure secure and exterior clean.
Quote review & open items
Resolve these details before production release.
| Item | Confirmation required |
|---|---|
| Product specification | Approved drawing revisions, materials, dimensions, and finishes used for pricing. |
| Cardboard protection | Board specification and construction of all five protective inserts: two flat side panels, one flat bottom panel, and two cubes. |
| Poly bags | Material, thickness, dimensions, and closure method for each product. |
| Small parts fit | Verify the 44 mm magnet and 35 × 35 mm cork sheet fit and seal inside the approximately 45 × 45 mm internal bag. |
| Box sealing | Adhesive, application method, flap sequence, and assembly/sealing labor. |
| Color identification | Confirm black Sharpie or permanent black ink is suitable for the printed box surface. |
| Customer-supplied parts | Delivery quantities and any requested allowance for loss or rejects. |
| Warehouse shipment | Master carton arrangement, quantity per carton, labeling, destination, and freight scope. |
This document supports final quotation. Unspecified details are requests for manufacturer confirmation, not approved production specifications.